- Home
- Getting started
- Your First Field Trip
How to start wildlife photography: Plan Your First Field Shoot With Confidence
You’ve chosen your camera. Maybe you’ve even tried photographing a squirrel in the garden or a robin at the feeder. But when it comes to heading out into the field, you might be wondering:
- Where do I start?
- How do I plan a wildlife shoot?
- What should I look for?
The good news? You don’t need to travel far, have expensive gear, or know everything about birds to begin.
Wildlife photography starts with curiosity, quiet observation, and a bit of planning.
In this guide, I’ll walk you through how to start wildlife photography - from choosing a location and understanding animal behaviour to composing thoughtful images and practicing with confidence.
This is about building experience, one walk at a time.
Let’s begin.
Planning Your First Wildlife Shoot
You don’t need to head into the wild with military precision—just a bit of thoughtful preparation can make a big difference.
To make planning even easier, consider using my nature walk checklist before you go.
However, here is a checklist so you can check you have the essentials before heading out.
✅ Charged camera battery
✅ Empty memory card
✅ One lens
✅ Weather-appropriate clothes
✅ Curiosity & patience
1. Choose a Nearby Location You Can Revisit
Start somewhere you can return to regularly—a local reserve, woodland, lake, or even your garden.
- You'll start to notice patterns in animal behaviour
- You can learn how the light changes throughout the day
- And most importantly—you’ll feel more comfortable each time you go
Many of my favourite shots were taken from indoors looking through the window!
 I didn’t plan it, but this ended up as a textbook case of the rule of thirds. The mouse off to one side, the daisies in the background—it all just worked.
2. Simple Fieldcraft Tips for Your First Outing:
These can make a world of difference—especially on your first few outings:
- Move Slowly & Quietly: Sudden movements or loud noises will likely scare wildlife away. Patience and gentle movements are key.
- Use Natural Cover: Blend in by using trees, bushes, reeds, or dedicated hides to break up your silhouette.
- Consider the Wind: When approaching mammals, try to move into the wind so your scent doesn't travel ahead of you. (Less critical for most birds).
Field Tip: For your initial outings, build confidence by focusing on more predictable or slower-moving wildlife. Think ducks on a pond, squirrels in the park, common garden birds near a feeder, or large birds like swans or geese.
Don't feel pressured to capture fast action like birds in flight right away – that will come with practice!
Don’t measure the success of your first shoot by how many photos you take. Just being out in nature, noticing things more closely—that’s a win in itself.
3. Research the Wildlife in the Area
You don’t need to memorise field guides—but a little knowledge helps.
- Look up what animals are commonly spotted at your chosen site
- Find out when they’re most active (dawn, dusk, seasonal?)
- If it’s a reserve or hide, check recent sightings boards or local wildlife groups
I keep a little notebook or use my phone to jot down animal patterns and lighting notes on each visit.
4. Consider the Time of Day
- Early morning: often the best light and quietest atmosphere
- Golden hour (late afternoon): beautiful warm tones, longer shadows
- Midday: can be harsh light—but good for active insects and butterflies
Even overcast days have their charm—especially for soft portraits and moody mist.
5. Keep It Simple the First Time
- Bring one camera and one lens (don’t overpack)
- Don’t worry about getting the “perfect shot”
- Just focus on observing, slowing down, and learning how it all feels
You’ll learn more in one quiet hour of patient watching than ten minutes of rushing around.
Try This Beginner Setup (It Works Almost Anywhere)
Want to get started without fiddling with too many buttons? Try this:
- Mode: Aperture Priority (Av or A) – lets you control background blur easily.
- Aperture: f/5.6 to f/8 – good for both portraits and some depth
- ISO: Auto (limit it to 3200 or 6400 if your camera allows)
- Focus Mode: Continuous AF (AF-C / AI Servo)
- Drive Mode: Slow Continuous or Single Shot
Composition Techniques for Wildlife Photography
You don’t need fancy gear to create a beautiful wildlife photo—just a thoughtful eye and a bit of awareness.
Good composition helps guide the viewer’s eye to the subject and gives the image a sense of intention. It’s like setting a little stage for your animal, letting them shine in the spotlight.
Try one of these easy, beginner-friendly techniques the next time you're out:
1. Rule of Thirds
Imagine your frame is divided into nine equal parts with two vertical and two horizontal lines. Placing your subject where those lines cross often feels more natural than centring it.
- Helps avoid awkward centre-heavy shots
- Adds a sense of space and movement
- Especially handy for birds on branches or mammals in landscape scenes
I often place robins just off to the side. It gives them a bit of breathing room and lets the background sing, too.
 This little robin appeared during a local dog walk—just long enough for a quick photo. The scattered twigs worked like natural arrows, leading the eye right to him.
2. Leading Lines
Look for paths, shadows, fences, or branches that draw the eye toward your subject.
- Adds flow and interest to your frame
- Great for action shots or animals in motion
Even a simple twig can guide the viewer’s attention if it’s pointing the right way.
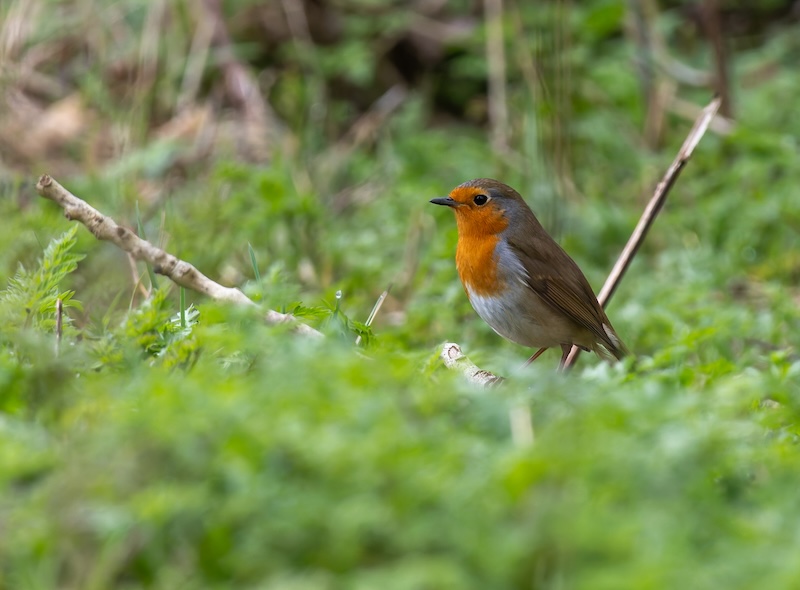 This little robin appeared during a local dog walk—just long enough for a quick photo. The scattered twigs worked like natural arrows, leading the eye right to him.
3. Frame Within a Frame
Use trees, tall grass, arches, or other shapes in nature to surround your subject.
- Adds depth and a sense of intimacy
Makes the viewer feel like they’re peeking into a hidden moment
Sometimes I just sit and wait—nature often gives you a ready-made frame if you’re patient.
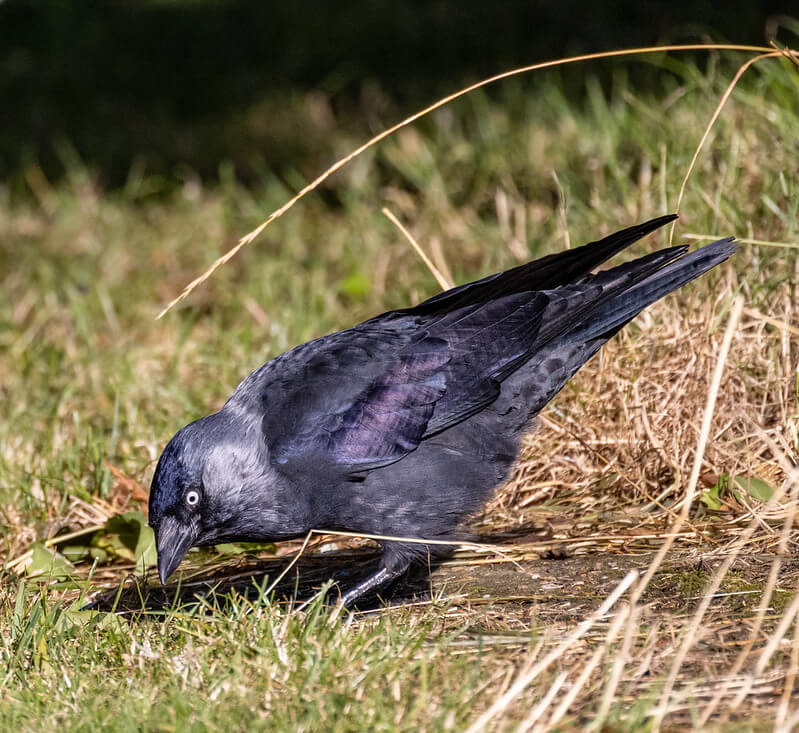 Sometimes nature does the composing for you. That single arc of grass echoed the curve of the Jackdaw’s back—an unplanned little gift that frames the moment beautifully.
4. Include the Environment
Zoomed-in shots are lovely, but stepping back tells a different kind of story.
- Shows the animal’s environment and mood
- Works especially well in fog, open fields, or woodlands💡
hat swan in the mist, below, wouldn’t have worked as a close-up—it was the emptiness and quiet that made it special.
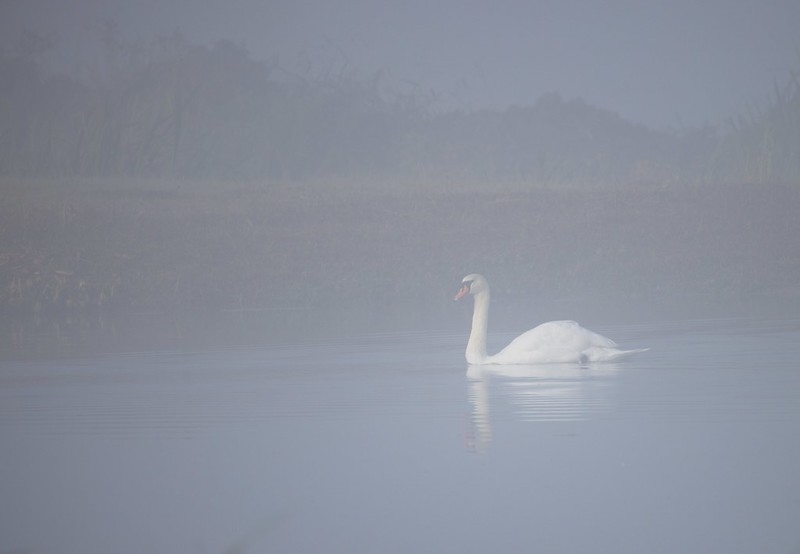 Sometimes it’s the mood, not the subject, that makes the photo. This swan drifting through the morning mist felt like a quiet breath from the landscape itself.
5. Break the rules (Yes, Really)
Once you've played with the classics, try something different:
- Crop closer than feels polite
- Tilt the frame a touch
- Centre your subject dramatically for impact
Some of my most memorable photos happened when I ignored the rulebook entirely and just went with instinct.
Try This on Your Next Walk: Pick just one of these composition ideas—say, framing or leading lines—and make it your goal for the outing. You don’t have to nail it. Just try to see the world through that lens for a little while.
Ethical Wildlife Photography: Respecting the Subject
There’s a quiet kind of magic in photographing wild animals—but with that comes responsibility. Our lenses let us observe, but they shouldn’t disturb.
Ethical photography means the welfare of your subject comes first—every time. Here are the guidelines I stick to on every outing:
1. Keep Your Distance
A long lens is your best friend here. Getting a good photo doesn’t mean getting physically close.
- If the animal changes its behaviour—pauses, stiffens, flies off—you’re too near
- Use natural cover and stay still
- Let them come to you (and they often do!)
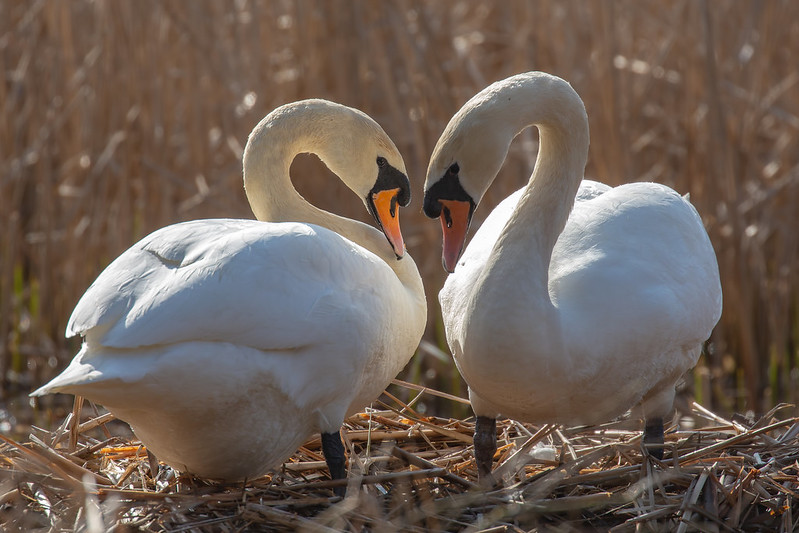 A quiet moment between Mute Swans at their nest—photographed from a respectful distance using a long lens and extender.
Getting too close to nesting birds can cause stress, or even lead to them abandoning their eggs.
Always let your lens do the walking.
2. Avoid Using Flash
Wildlife + sudden burst of light = not a great combo.
- Flash can startle, especially birds and nocturnal creatures
- Natural light is softer and more honest anyway
If it’s too dark to shoot, maybe it’s a moment to just sit and enjoy.
3. Leave No Trace
We’re visitors in their world. Let’s leave it exactly as we found it (or better)
- Stay on established paths or trails
- Don’t trample plants, nests, or sensitive habitats
- Carry your litter—and if you see someone else’s, pick it up too
On one butterfly outing to Fermyn Woods, a gorgeous patch was ruined by careless trampling. The butterflies didn’t come back.
4. Follow Local Guidelines
Nature reserves, parks, and wild places often have specific rules for good reason.
- Some areas protect nesting sites or rare species
- Dogs may be banned during lambing or breeding seasons
- Check local signage, ask rangers, or look up info online before you go
- Always follow the UK Countryside Code regarding wildlife and land access.
I once saw a dog chase sheep through a protected meadow—its owner couldn’t call it back. It was heartbreaking.
Gentle Reminder: The best wildlife photos happen when animals feel safe enough to carry on as if you’re not there. That’s the moment to wait for.
Tip: The most rewarding photos come when animals feel safe enough to act naturally. That’s the moment worth waiting for.
Practice Locally: Grow Your Skills Close to Home
ou don’t need to travel far—or wait for a red-listed rarity—to become a wildlife photographer. Some of the best skills are grown right on your doorstep.
Staying close to home takes the pressure off. It helps you build muscle memory, experiment freely, and start seeing the familiar with new eyes.
1. Start in Your Garden (or Balcony)
- Set up a bird feeder or shallow water dish
- Sit nearby with your camera and just watch
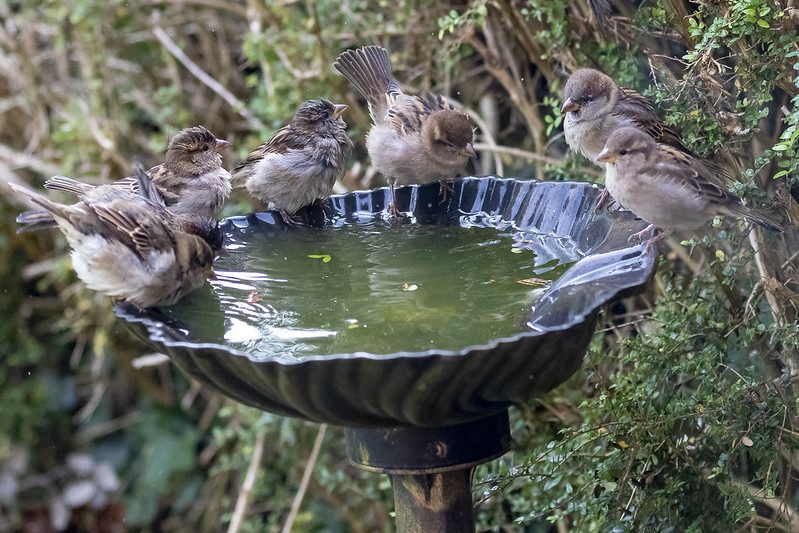
- Try focusing on one species or behaviour (splashing in water, feeding, preening)
I spent weeks photographing robins and blackbirds in my garden. They’re still some of my favourite shots.
2. Visit a Local Park or Reserve
- Look for squirrels, ducks, rabbits, or even butterflies
- Walk slowly. Stop often. Let the wildlife come to you
- Observe how light changes in different areas
One park, four visits, four completely different moods. Nature’s never the same twice.
3. Practice at a Zoo or Wildlife Centre
Zoos might not be wild, but they’re great for building technique:
- Track animals in motion, practice focus modes and timing
- Use shallow depth of field or natural framing to avoid distracting fences
- Observe body language and behaviour up close
Zoo photography helped me understand animal movement—lessons I now use every time I spot something in the wild.
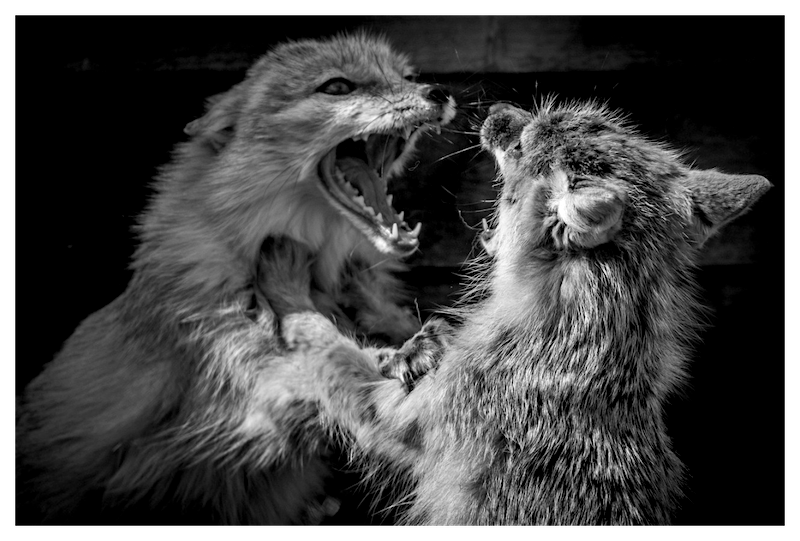 Captured at the zoo: these Corsac Foxes were mid-tussle, offering the perfect moment to practise timing and focus. Even in a captive setting, there’s so much behaviour and character to observe.
Tips for Returning Visits Make a habit of going back to the same place. Over time, you’ll start to notice:
- Where the light falls best
- Where birds tend to perch
- When animals are most active
These small insights add up—and before long, you’ll feel like part of the landscape yourself.
Celebrate Your Progress (Even the Blurry Photos)
Wildlife photography is more than shutter speeds and sharpness.
It’s about patience, noticing, and turning ordinary moments into something meaningful.
You don’t need a prize-winning photo to feel proud. If you showed up, slowed down, and tried—well, that’s the good stuff.
1. Join a Friendly Photo Community
- Share your work in beginner-friendly forums Flickr or Reddit’s r/WildlifePhotography
- Learn from others and get kind, constructive feedback
- Find encouragement when you need a little nudge to keep going
Seeing how others approach the same subject gave me loads of inspiration—and ideas I never would’ve tried on my own.
2. Share on Social Media (If You’d Like To)
- Add a caption like: “Still learning, but proud of this one. Spotted this wren on my morning walk.”
- Use hashtags like #wildlifephotographybeginner or #naturephoto
- You’ll find your people—those who appreciate the story behind the shot
You might inspire someone else to dust off their camera and look closer at the world around them.
3. Enter a Local Competition
- Wildlife trusts, councils, and reserves often run seasonal photo contests
- You don’t need to win—just entering helps you commit to finishing and sharing
- Sometimes, just the deadline helps spark creativity
That first Mayfly photo that started everything? I entered it on a whim. It led to a lot more than I expected.
Tip: Revisit your early photos every few months. Notice what you’ve learned, how your eye has changed, and what moments you value now. Growth sneaks up on you—but it’s there.
Wherever you go next—whether it’s your garden, a local wood, or a misty path at dawn—just know:
You’re doing it right.
Every pause. Every blink. Every slightly out-of-focus bird on a branch.
It’s all part of the journey.
Happy walking. Happy watching. And whenever you’re ready—because now you know how to start wildlife photography.

About the Author
Carol is a wildlife photographer and nature writer based in the East of England, with a passion for peaceful walks, patient observation, and capturing life’s quiet wonders.
Through her lens and words, she shares the stories of the natural world — from bluebells and butterflies to birds like the great crested grebe.
Get closer to UK nature
Subscribe to Wild Lens!
Want to discover more hidden walks and wildlife moments?
I’d love to share my latest nature finds, photo tips, and peaceful walk recommendations with you.
💌 Join my newsletter Wild Lens—it’s free, occasional, and always rooted in a love of the natural world.
Subscribe below and come exploring with me.


